

Import and export
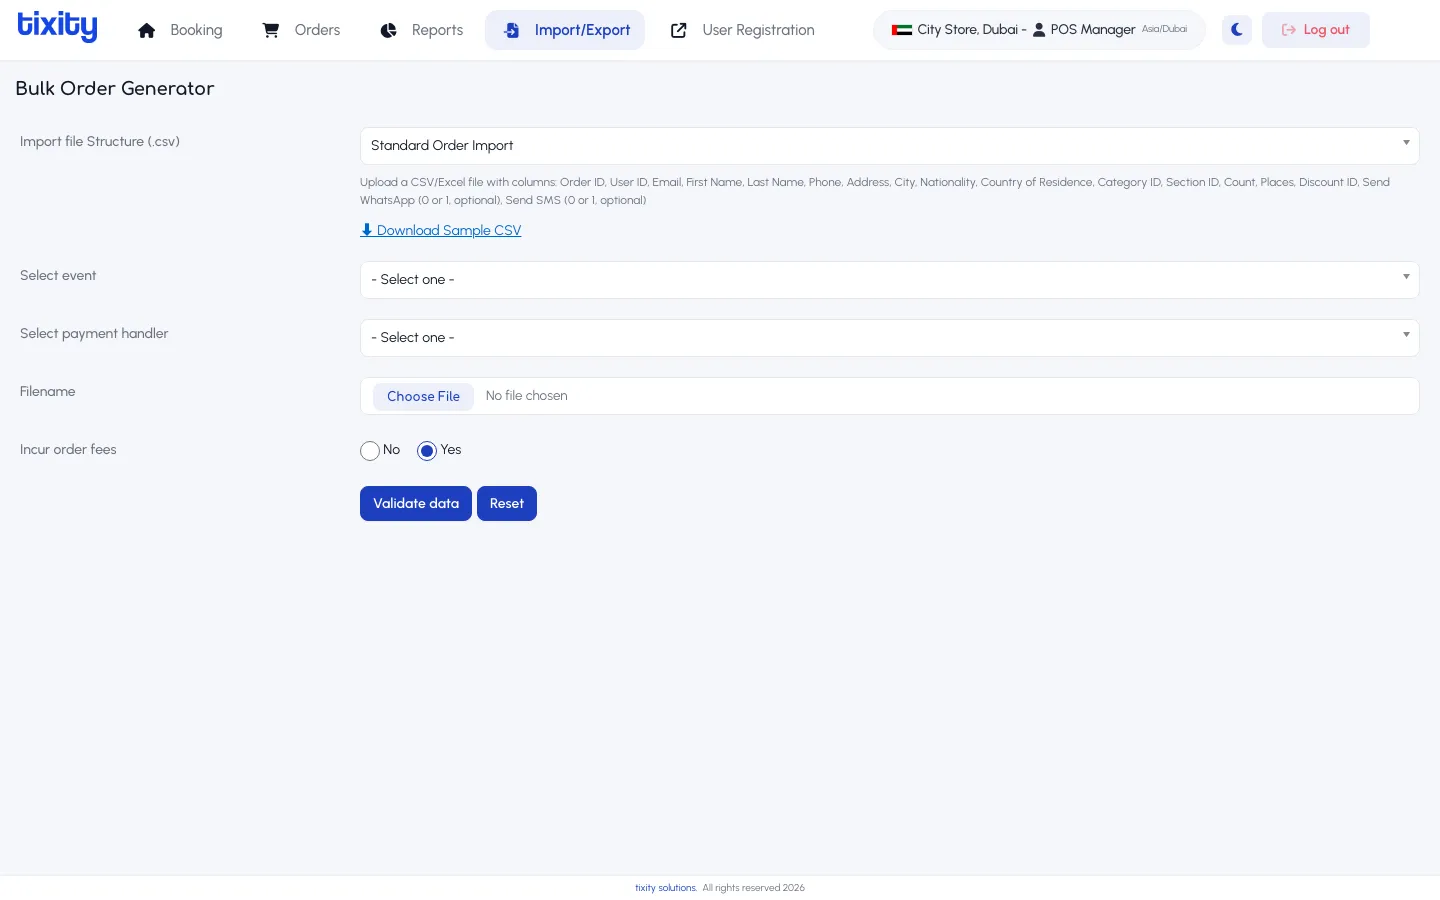
The Import/Export tab is where bulk operations live. The main tool here is the Bulk Order Generator, for creating a batch of orders from a spreadsheet in one go. This is the flow you’ll use for corporate blocks, sponsor allocations, and pre-sold groups that come in on a list rather than one-by-one.
When to use it
- A sponsor sends over a list of 200 attendees and expects each to receive a ticket by email.
- A school group has paid in advance and needs one order per family, not one big order.
- A hotel package has already been billed and you just need tickets issued to the guest list.
If you have fewer than about ten orders to place, it’s usually faster to key them in through Booking. The importer is designed for tens, hundreds, or thousands of rows at a time.
The form
Every field has to be filled before Validate data activates.
Import file structure
A dropdown of the import formats your store supports. Standard Order Import is the default and works for most cases. The description under the dropdown lists the columns your file needs, in order:
Order ID, User ID, Email, First Name, Last Name, Phone, Address, City, Nationality, Country of Residence, Category ID, Section ID, Count, Places, Discount ID, Send WhatsApp (0 or 1, optional), Send SMS (0 or 1, optional)
Any column not marked optional is required for every row.
Download Sample CSV
Below the description is a Download Sample CSV link. Always start from this file. It has the correct column headers, sample rows, and the exact format the importer expects.
Select event
The event these orders are for. Every row in the file will be attached to this one event, so keep separate spreadsheets per event.
Select payment handler
How the orders should be recorded. Pick the handler that matches how the customer actually paid.
| handler | when to use |
|---|---|
| B2B | The buying company is on account and will be invoiced |
| Cash | Cash was collected in advance |
| Credit / Debit Card | Card was taken through your terminal outside the POS |
| Complimentary | Tickets are being issued at no charge |
If you’re not sure which handler to pick, ask your store manager. Handlers control how the orders show up in Reports and cannot be changed after the import.
Filename
Click Choose File and pick your prepared CSV or Excel file. Only one file per import.
Incur order fees
| choice | effect |
|---|---|
| No | The imported orders don’t add service fees on top of the ticket price |
| Yes | Standard service fees apply, same as if the customer bought through the POS |
Use No for pre-negotiated corporate bookings where the total was agreed before the fee. Use Yes for anything that should mirror a normal sale.
Running the import
- Prepare the CSV using the sample as your template.
- Fill the form: file structure, event, payment handler, filename, incur order fees.
- Click Validate data.
- The importer parses the file and shows a validation report: which rows are valid, which have errors, and what’s wrong with them.
- Fix any errors in the file and re-upload, or click Reset to start over.
- Once everything validates, confirm to create the orders. Each row becomes its own order, and each order fires the same email and SMS flow as a normal sale.
Tip: Test with a two-row file first. It’s much faster to catch a bad column mapping on two rows than on two hundred.