

Getting started
Signing in
Open your store’s POS URL in any modern browser. You’ll be prompted with your operator username and password. Once you sign in, the browser remembers your username, so on your next shift you only need to enter the password.
Tip: Your POS URL and credentials are issued by your tixity account manager. Each store has its own login.
The header
The top nav has everything you need for orientation, and nothing else.
| item | what it does |
|---|---|
| Booking / Orders / Reports / Import-Export / User Registration | Top-level sections. You’ll spend most of your shift in Booking |
| Store and manager chip | Shows the store you’re signed into and the operator on shift, with the timezone |
| Workstation gear | A settings icon that appears when a card terminal is installed. Click it to pick which terminal this browser talks to |
| Toggle dark mode | Switches the whole interface between light and dark |
| Log out | Ends your session |
Tip: Reports and Import/Export only appear if your role has been granted access. If you can’t see them and think you should, ask your store manager to check your permissions.
The four zones
Every sale moves left-to-right and top-to-bottom through the same four zones. Once you know them, the rest of the guide is just detail.
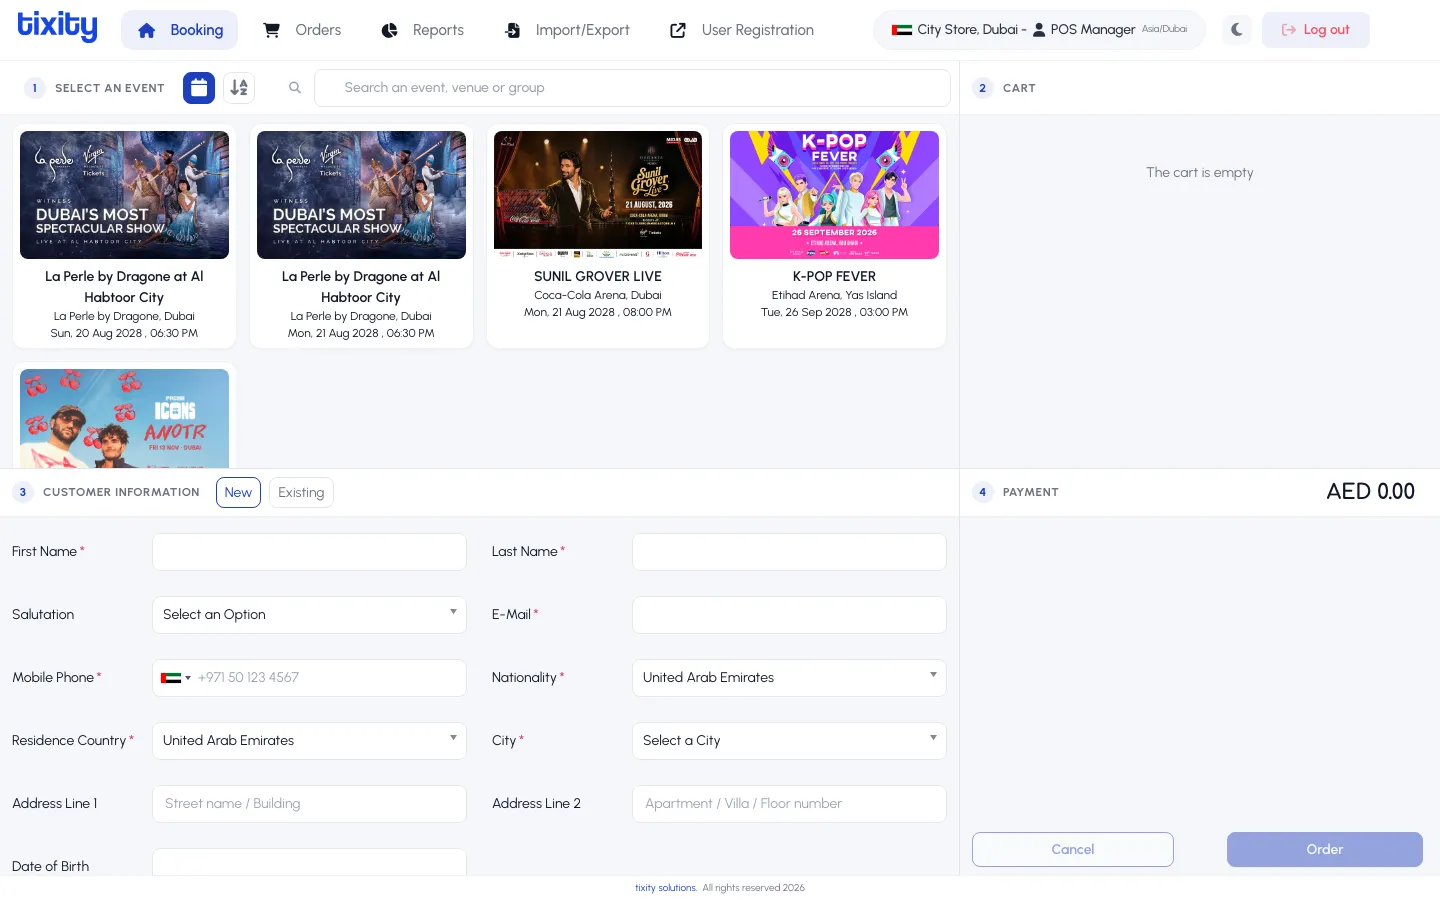
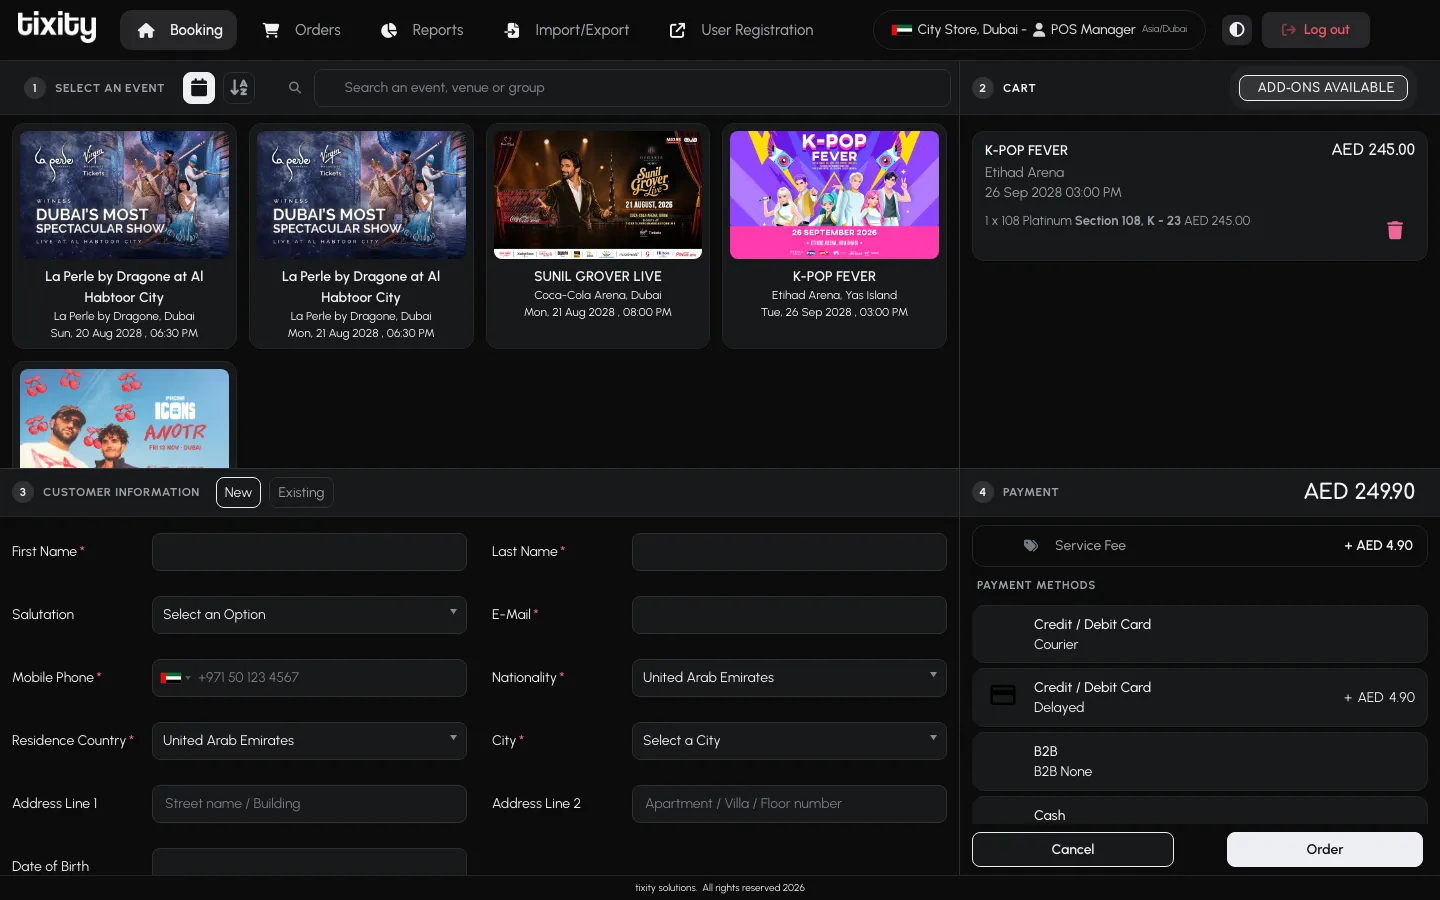
- Booking takes up the left side of the screen. This is where events, categories, and the seat map live.
- Cart sits at the top right. It stays empty until you add tickets, then updates in real time.
- Customer Information is the form below the booking area. You can enter a new customer or search for an existing one.
- Payment sits at the bottom right, with the service fee breakdown, payment methods, and the Order button.
Before you take your first sale
- Check the store and timezone in the top nav match where you’re working.
- Toggle to the theme that reads best in your lighting.
- Take a moment to scan the event grid so you know what’s on today.