

Introduction
The tixity Point of Sale (POS) is the interface your box office team uses to sell tickets in person. Open a session from any browser at your store’s POS URL, pick an event, choose seats or a category, add addon-ons, capture the customer’s details, take payment, and finalise the order. Everything happens on a single screen.
Who this guide is for
Box office operators, on-site sales staff, and store managers who process ticket sales in person. If you build the seatmaps or set up the events themselves, see the Seatmap Designer guide instead.
What you can do
The POS is designed for a fast, linear flow, plus four supporting tabs for the rest of the shift.
Booking (the main flow)
| step | what happens |
|---|---|
| 1. Booking | Select an event, pick a category or seats, review the cart |
| 2. Add-ons | Offer food, amenities, and other extras where the event supports them |
| 3. Customer | Register a new customer or attach the sale to an existing one |
| 4. Payment | Choose a payment method and finalise the order |
The other tabs
| tab | what it’s for |
|---|---|
| Orders | Look up past sales, refund, exchange, resend, and add notes |
| Reports | Sales overview, daily takings, and per-ticket breakdowns |
| Import/Export | Bulk-create orders from a spreadsheet |
| User Registration | Create a customer profile without starting a sale |
Interface overview
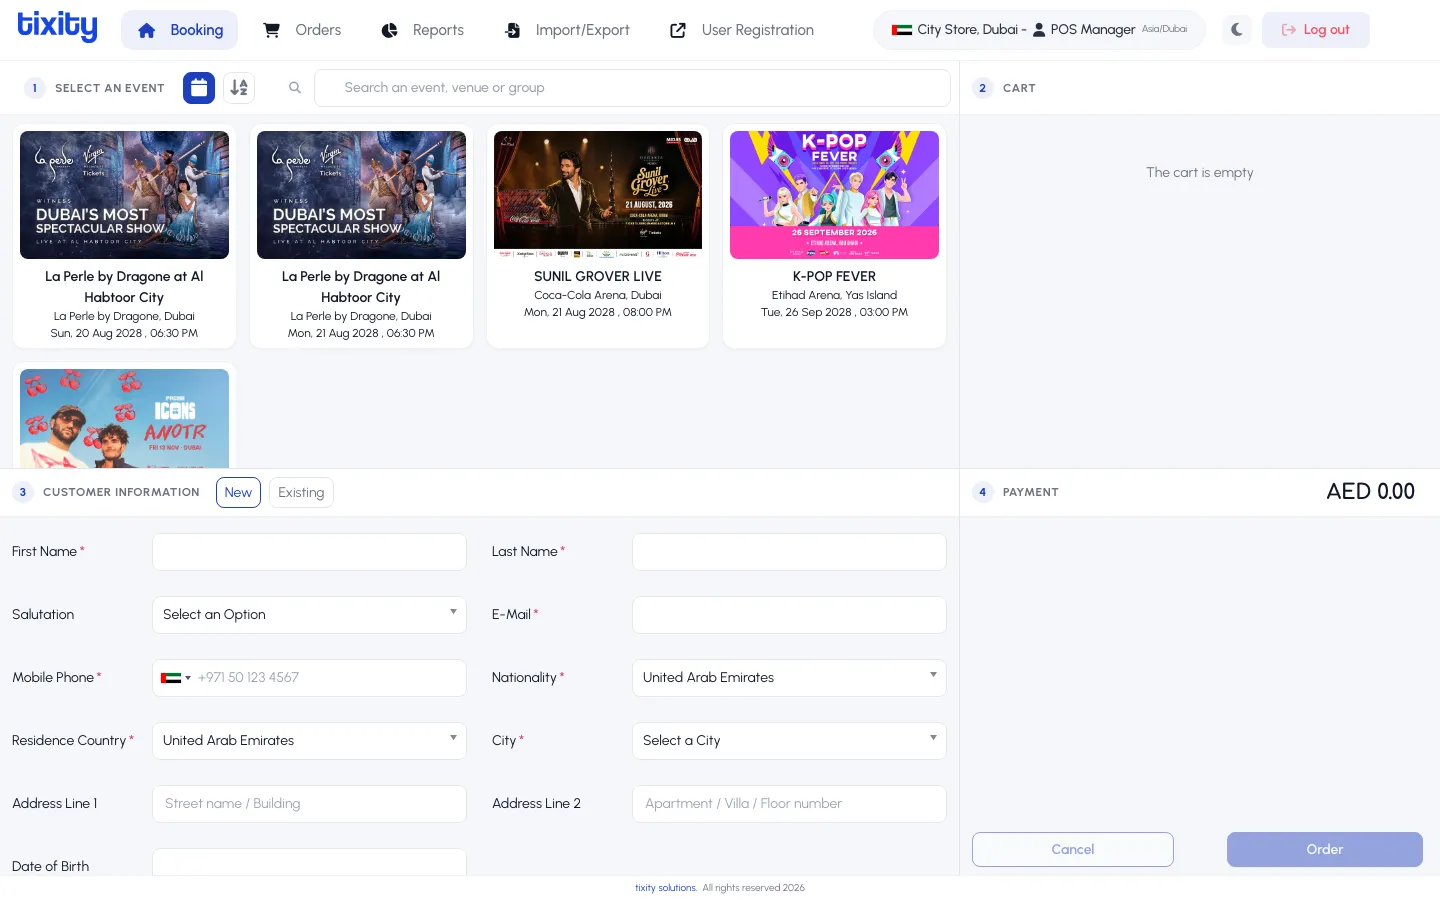
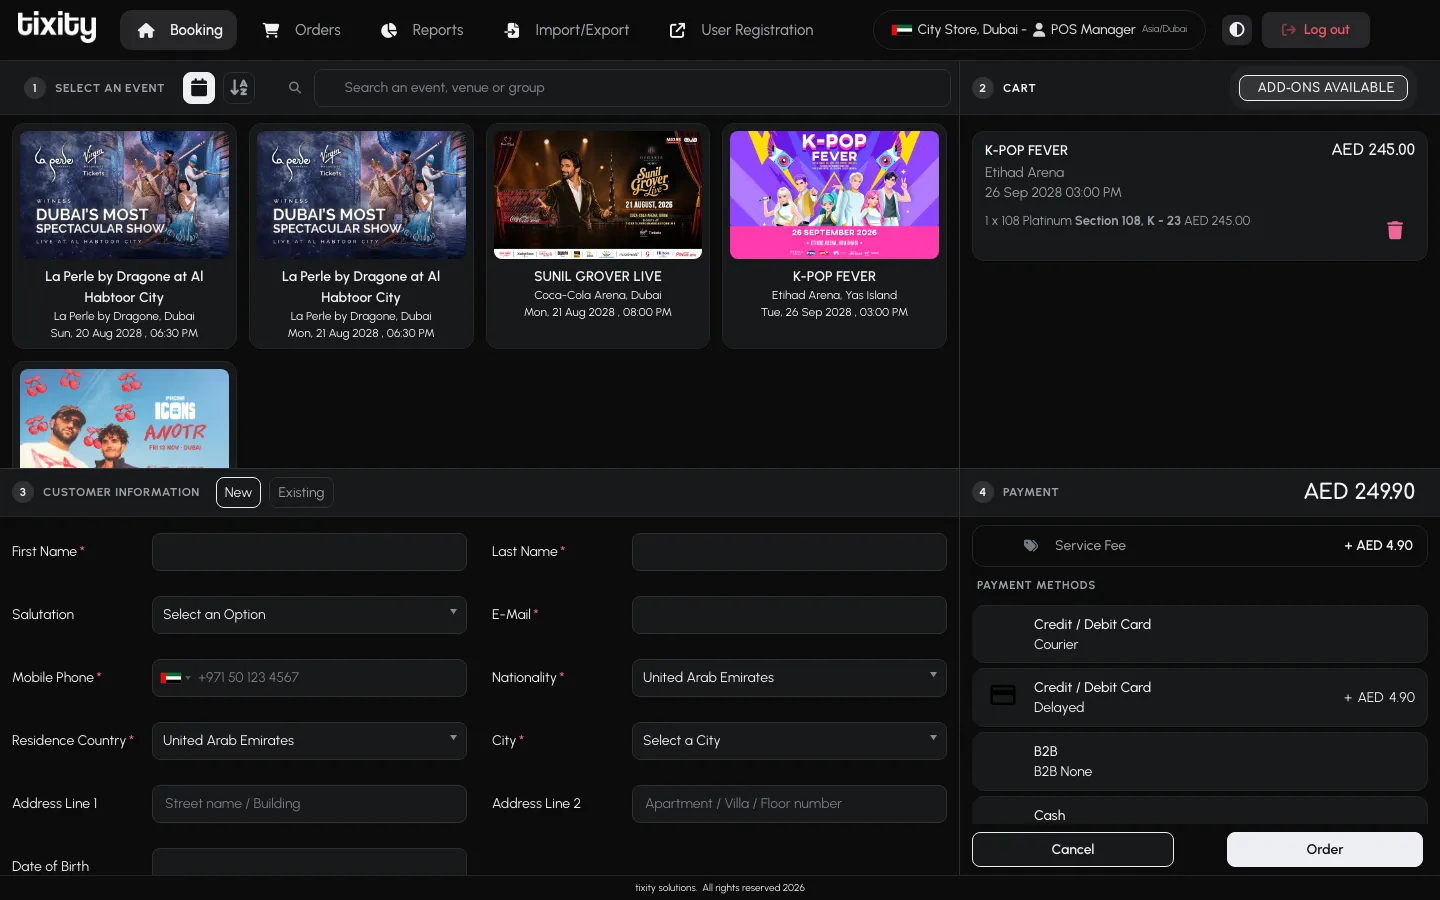
The POS is split into four numbered zones that mirror the order flow.
| zone | what it shows |
|---|---|
| 1. Booking | The event grid, category picker, and seat map dialog |
| 2. Cart | Selected tickets, running total, and the Add-ons Available pill when extras are offered |
| 3. Customer Information | New or existing customer form |
| 4. Payment | Service fee breakdown, payment methods, and the Order button |
Light and dark mode
A Toggle dark mode button sits in the top nav next to the store selector. Use whichever suits your lighting. Every screenshot on this site follows the theme you’ve picked in the top-right, so toggling the docs theme swaps every POS screenshot to match.
In this guide
- Getting started — signing in and understanding the layout
- Event selection — picking the show and performance
- Categories — choosing a ticket type and price band
- Seat selection — using the venue map to pick individual seats
- Add-ons — food, beverage, parking, and other extras
- Customer information — new customers and repeat buyers
- Payment and order — completing the sale
- Orders — refunds, exchanges, notes, and reservations
- Reports — sales overview, daily sales, and ticket sales
- Import and export — the Bulk Order Generator
- User registration — creating a customer profile